Rats sleeping in their cage

Keeping pet rats together – what you need to know

Rats are sociable little pets and love to be in the company of other rats for comfort and protection. Without companionship, rats will often become depressed, nervous or aggressive.

How many rats can live together?

Rats thrive in groups and pairs – a trio or more is ideal as they create their own social network. Pairs of rats can sometimes clash with one another and show dominant behaviour. Giving your rats the opportunity to spend time outside of their enclosure, providing plenty of resources and fun activities for them to engage with can help prevent this.


Can male rats live together?

Rats live best together in same-sex groups. However, neutered males can live with females if they don’t bond well with other male rats. The same goes for females too if they are especially tricky to mix with other females. If this is the case, they must be neutered by an experienced, rat-friendly vet.


Introducing your rats to each other

Here we explain the different methods for introducing your pet rats to one another and the reasons for trying each one and the success rate.


The Carrier Method

The Carrier Method happens in a small space and is the most common method used by rat carers in the UK. It’s widely reported as being the most successful and least likely to result in severe injuries. The method involves placing all rats into a small cage or carrier with a water source, food and bedding. Gradually their space is made bigger and the rats are introduced to new activities and items to investigate. Due to the small space they’re in to begin with, this means there’s less area for rats to defend and become dominant over. This helps rats effectively resolve their disagreements which can avoid injuries in the small space they have. This method is a quick and effective way of fixing disputes and reducing stress levels compared to other methods. See below for a step-by-step guide more details on how to introduce rats using this method.


The Neutral Space Method

The Neutral Space Method as its name suggests, involves placing rats in a neutral space together. A few squabbles are okay, but anything that could lead to injuries are stopped. At the end of the session, the rats are returned to their own enclosures. It will take a number of sessions until the rats seem disinterested in each other. The rats can then be moved into a clean cage, and if this goes well, they stay together permanently. A neutral space is equal and doesn’t belong to any of the rats. However, there are risks of more severe injuries if a disagreement goes too far. For rats who are regularly introduced to other rats and then split up, it can be a stressful experience. This method works well for rats who are level-pegging, or if there are mature members of the group.


See our guide below on how to introduce rats to each other using the neutral space method.

Carrier/Small Space Method

If you notice your rats squabbling as you move onto the next stage, move back a step. Once they’re settled after a day or so, you can continue.


Stage one

Firstly, look at the size of the group as this will depend on the space they’ll meet in. For a group of five to 10 rats or more, we recommend a small wire top, plastic bottom type cage (approx. dimensions W46cm x D29.5cm x H23cm to W50cm x D35cm x H25cm) or a top opening wire cat carrier. Both options have enough space for the mixing and you can see the rats clearly. There’s also a good amount of airflow, which is very handy in the summer. A water bottle or two can be attached easily too.

A small cage with several rats of various colors, a water bottle attached outside.

If mixing a group of four rats or less, the best space for this is a large pod type carrier (approx. dimensions 36cm x 26cm x 23cm) with a water bottle attached. This type of cage may be more appropriate if a small cage has too much space and you’ve noticed a few squabbles, or if the group of rats have been difficult to mix previously.  This type of carrier can become quite hot in the summer months and you can’t see inside as well as you would using a small cage.

A purple and white pet carrier with a clear lid and attached water bottle.

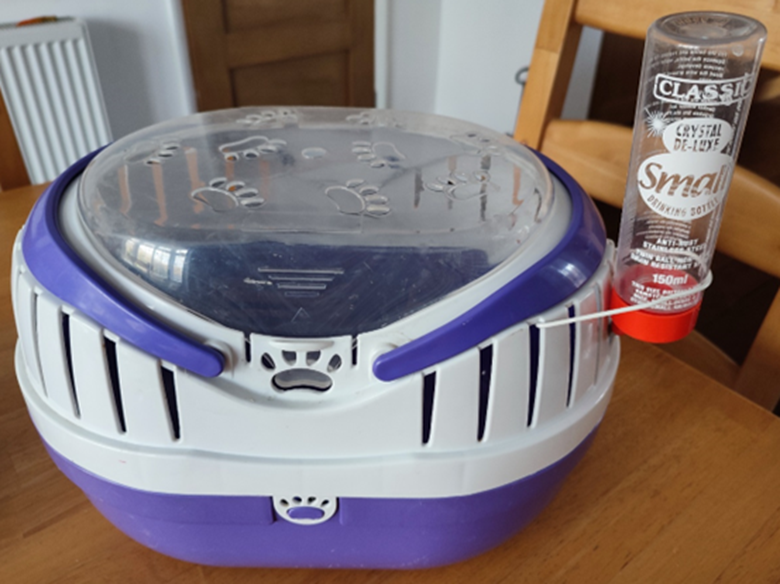
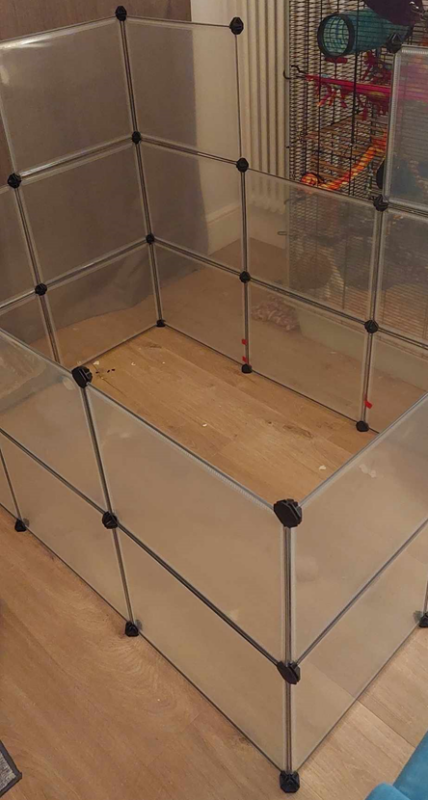
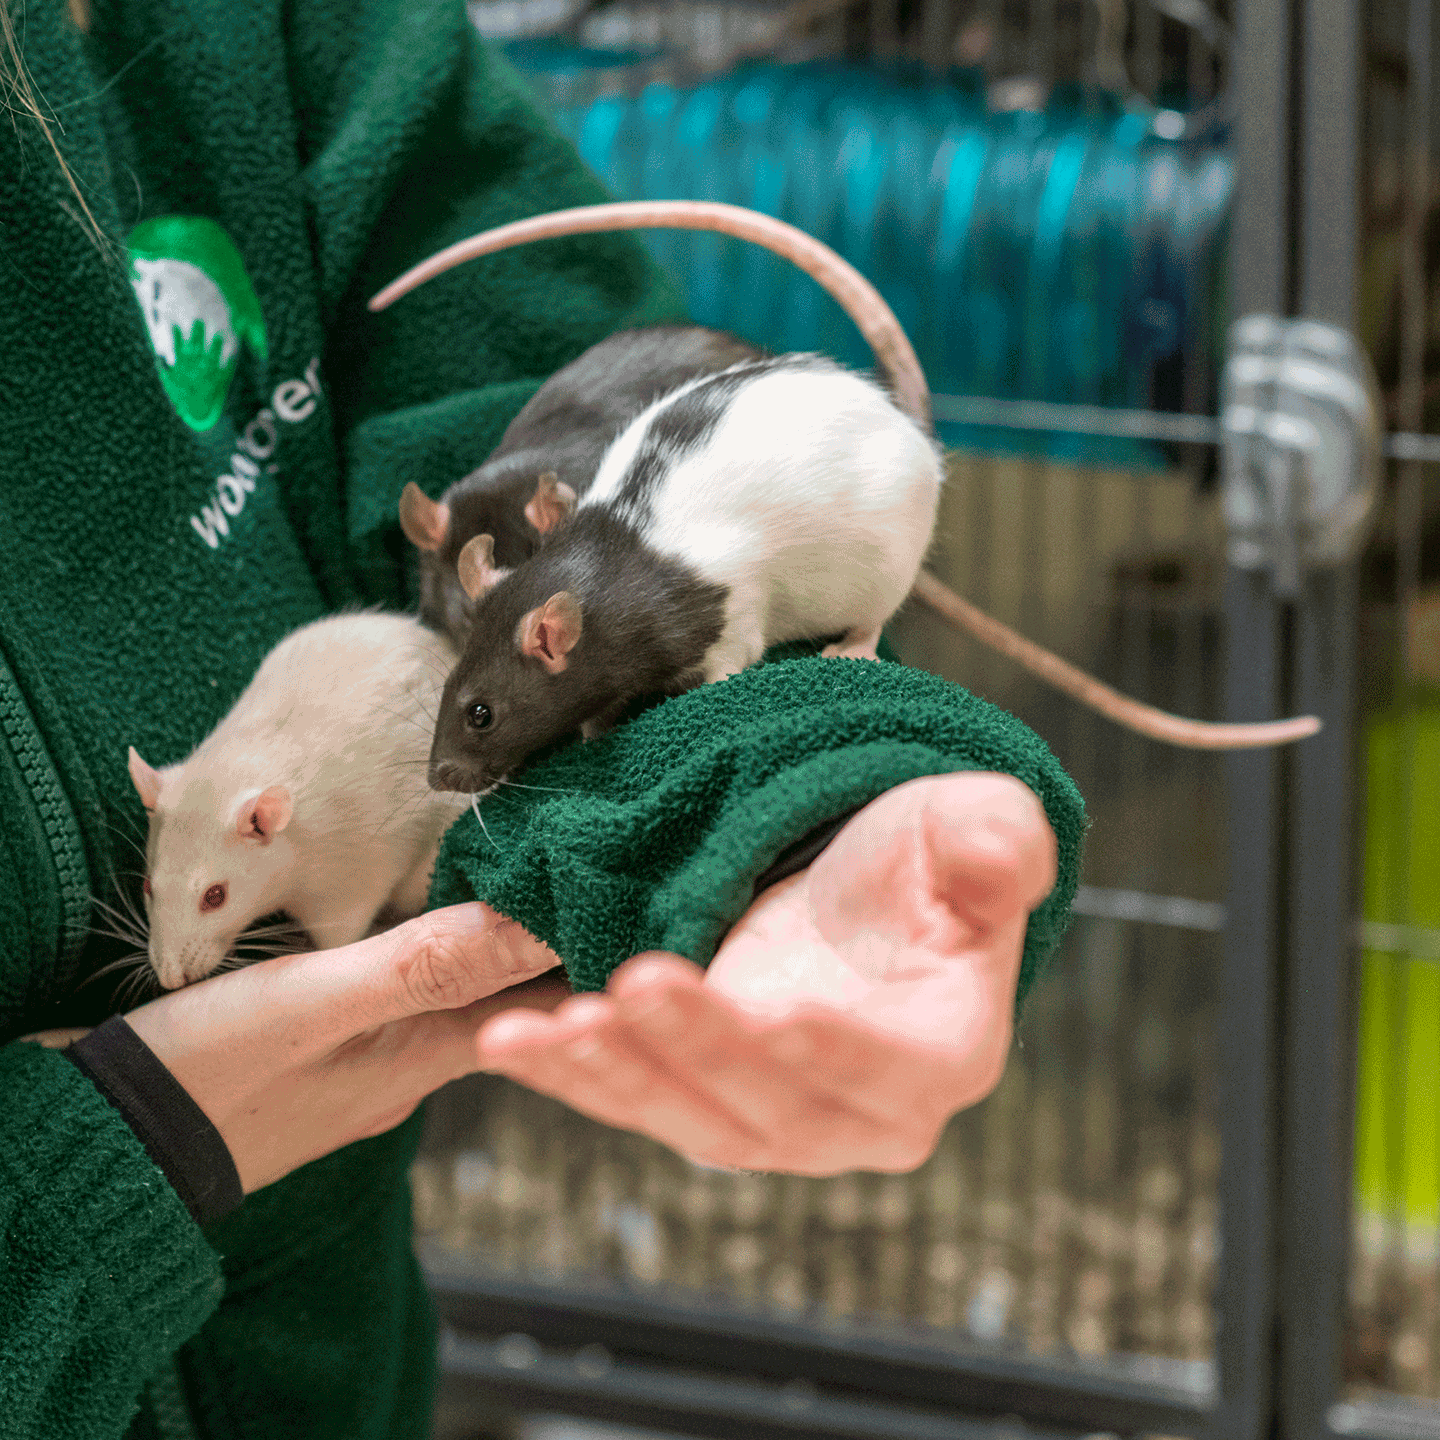
Once you’ve decided which carrier you’re using, place some clean bedding on the floor with food scattered on top and a water bottle attached to the side. Avoid introducing toys, hides or hammocks at this stage as this can cause problems like fighting. Place your rats in the carrier at the same time – you can expect to see a bit of activity at first while they’re working out who’s who. When picking up your rats, make sure you handle them with care. Our guide on how to handle you rats will help them feel safe and calm.

Typically, the rats will need to stay in this space for at least a day. If you spot them choosing to sleep close to each other, spending time together, and relaxed movements, you can consider moving to the next stage. We’ll talk about positive behaviours later on!


Stage two

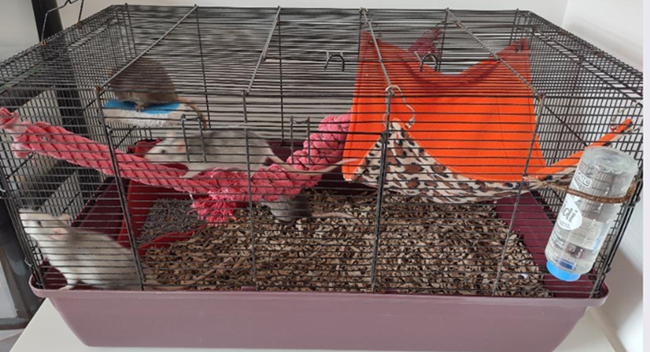
Once your rats are relaxed and content around one another, with no signs of friction, a flat hammock can be introduced to add a bit of interest. If you’re using a pod style carrier, skip to stage three.

If they start squabbling once you’ve put the hammock in, go back a step and remove the hammock. Wait until they have been settled for a day or so before trying to add it back in the space.


Stage three

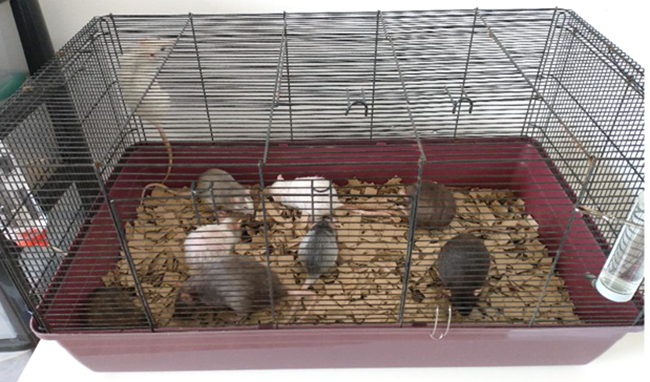
When you’re confident the rats are content around each other in the pod carrier, or have been comfortable in the cage with the hammock, it’s time to move them into a slightly larger space.

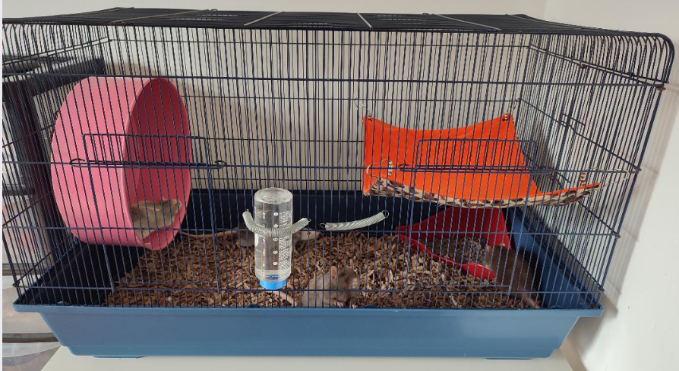
For this stage, you’ll need a wire top, plastic bottom cage (approx. dimensions 80cm x 50 cm x 40cm) with no toys. Add some of their clean bedding from the previous space to this new cage, scatter some food and provide a water bottle or two. If you notice any squabbling in this bigger space, move them back a step. Wait until they have been settled for a day or so before trying again.

A cage with a red base containing several rats of various colors and an attached water bottle.

Stage four

Like the other steps, once you know they’re happy around each other, add a large, flat hammock to the space and possibly a litter tray to help keep things hygienic. Monitor them closely as before and go back a step if they start bickering. Place the hammock back after a day or so. If all is well after this, move onto the next stage.

A cage for rats, with a leopard print hammock and water bottle

Stage five

At this stage, you can add one flat, open enrichment (pictured below) into the cage over the next few days, until it is fully furnished. We don’t recommend any enclosed spaces such as tubes or tunnels. Keep a close watch on your rats for a week, if you’re happy with their progress and see them getting along, consider moving to the next stage – moving them into their main cage!

A cage with rats playing with enrichment toys

Stage six

Clean the space and set it up with just bedding (use a handful or two of clean bedding from their previous space), some food scattered around and a water bottle or two attached. At this stage, you can add a suitable sized wheel, this can be a good way for young rats or active females to burn off any excess energy. You can also add a litter tray if you like.

A rat cage that has just been cleaned

For double-tier cages, it’s best to limit their access to one tier at first. It may take a day or two before they are ready to move up to this stage, it all depends on the rats. If there are signs of squabbling after the move into the larger space, move them back a step into the smaller cage. Wait until they have been settled for a day or so before trying again.


Stage seven

Move onto this stage if your rats are happy and content and you may want to add a hammock in for them.

A clean rat cage with a clean hammock now in place

For the first week or so, keep their enrichment simple with a few hammocks, ropes, perches and parrot toys. Slowly add a few more items every couple of days.

A clean rat cage, with enrichments toys added over time

Once the space has been fully furnished and you haven’t noticed any squabbles between your rats for at least a week, more enclosed hides can be added. For those with a large, double tier cage, at this stage, you can fully enrich the other half and open access to it.


Neutral Space Method

In the past it was more common to start rats in a larger neutral space for a period of 20-30 minutes before moving them into a carrier but it was found this was less advantageous in general than putting them straight into the small space. Older mixing guides may state this as an option to consider.

This method involves introducing rats in a neutral space which none of them have access to normally. Good spaces to use include a bath with some towels placed across the bottom, within a small bathroom (just make sure the toilet seat is down!) or in a playpen.

A neutral space for rats to socialise

Scatter some food around the space and provide access to a water bottle or a shallow bowl of water.

Place all the rats into this space at the same time and watch them closely (see below for the different behaviours you might see). You may be able to keep them in this space for one-two hours depending on how well they settle and get along. It’s important that some positive behaviours are witnessed whilst these sessions are happening. Place them back in their respective cages and repeat this daily.

Once they’re content and relaxed around one another, consider adding safe branches or chew toys, but nothing they can get stuck in and cornered by one of the other rats.

After they have had a series of successful meets, with enrichment in their neutral space, it’s time to make your rats feel at home and move them into their main cage or a single tier of their main cage if they usually have a double tier cage.

Clean the space thoroughly and set up with clean bedding, scatter some food and attach one or two water bottles. Add in one or two flat, clean hammocks initially before placing in your rats. You can then slowly add a few new enrichment items every few days until the cage is back up to normal levels of enrichment. Ensure that no enclosed enrichment is used for a few weeks until the group is settled.

If you feel there’s too much space and the rats immediately start to squabble, it might be best to follow the carrier method. If you notice one rat that’s causing trouble when all methods are used, it’s a good idea to seek advice from your rat-friendly vet in case there is an underlying health issue present or if neutering may be required.


Positive behaviours you may see

  • Bottom sniffing
  • Shuffling round the bedding
  • The more dominant potentially fluffing their coats and regularly placing their paws on the back on the others to try to be assertive.
  • Self-grooming
  • Small amount of squeaking
  • Submissive rats will move around less
  • All rats choosing to sit apart after a few moments of initial full on activity
  • Eventually falling asleep curled up alone during the first few hours
  • Sleep bundles when they are more content.


Behaviours to look out for that need intervention

  • Chasing
  • Rat balling (rolling around in a ball with another rat)
  • Biting the other rats
  • Tail wagging
  • Side shuffling/barging excessively
  • Teeth chattering.


Keep a close eye on your rats for the first two weeks

Each rat should be checked for injuries throughout the first two weeks of introductions. Fight wounds can get infected so you may need to take your rats to your vet for a check-up.

If you are unsure of how your mix is going or you need support mixing your pet rats please contact us.

How helpful was this?

Thanks for your rating

Rated this article 3 stars or less? Tell us what we could do to make it more helpful.

4.6
(53)
Let's do it